Blackstone Heat Zone Setup: How to Cook on All 4 Burners at Once
The flat-top griddle has one advantage over every other outdoor cooker: independent heat zones across a single cooking surface. You can sear a steak at 500°F on the left while finishing it with butter basting at 400°F in the center while holding finished sides at 225°F on the right — all simultaneously, all on the same surface, without any juggling between grill grates and warming racks.
That’s the skill. Not recipes. Not seasoning. The ability to set and manage zones across your burners is what separates a griddle cook who makes food sequentially from one who plates a full meal at the same time.
This guide covers how to set up zones, the standard configurations for common meals, and how to shift zones dynamically as a cook progresses.
What a Zone Is (and Isn’t)
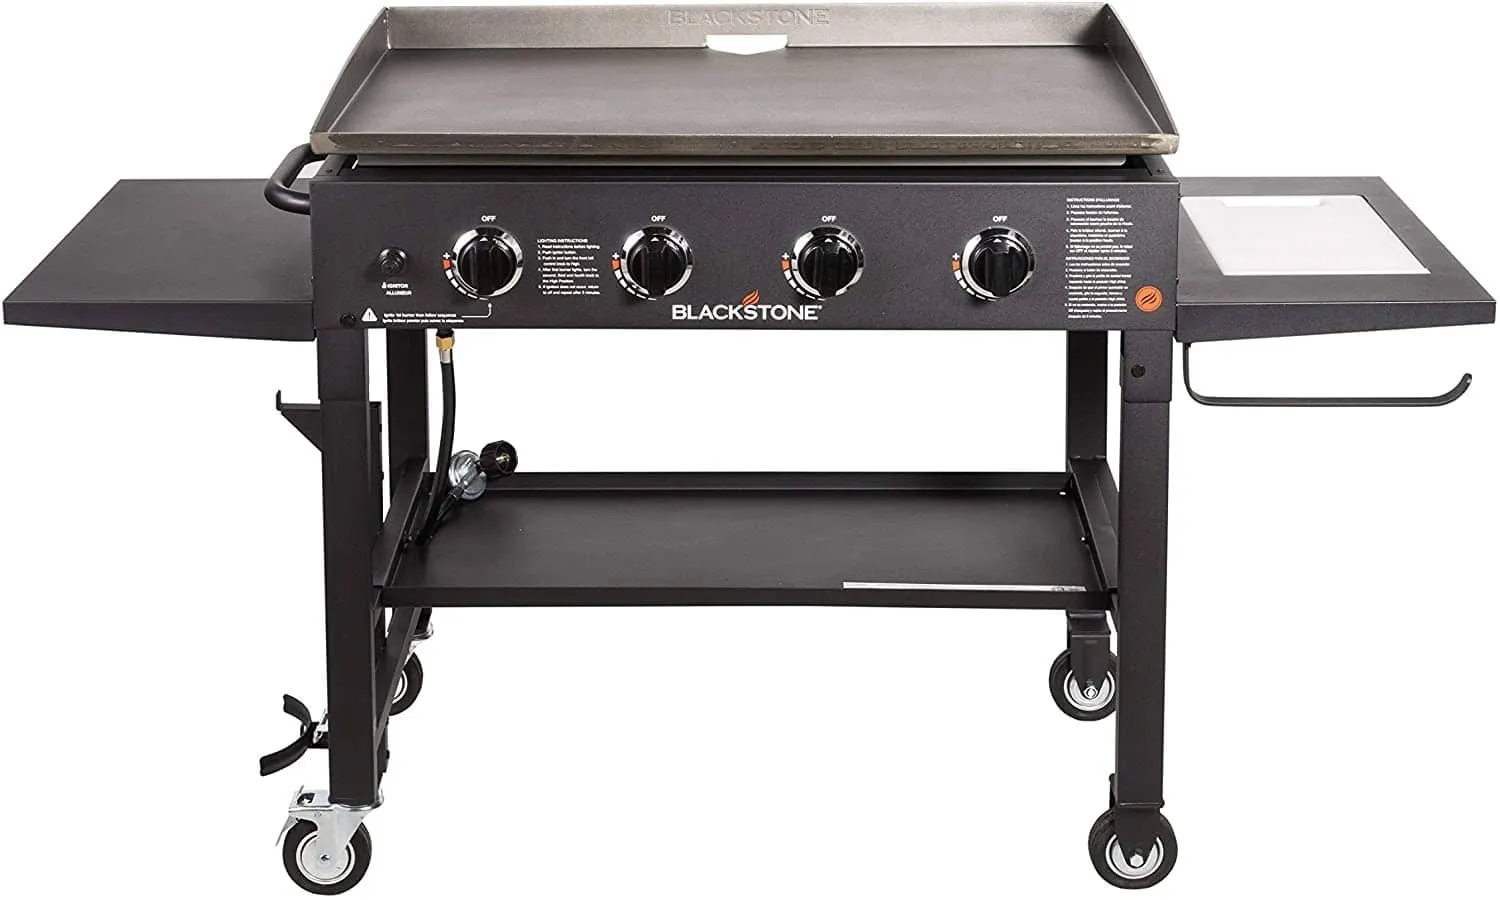
On a Blackstone, each burner controls a roughly rectangular band of the cooking surface. A 36” four-burner has four zones running side to side; a 28” two-burner has two. The zones overlap at their edges — the griddle surface conducts heat laterally — so there’s no hard wall between a high-heat zone and a medium-heat zone. The transition is a gradient about 3–4 inches wide.
This matters because:
- Food crossing the zone border will continue cooking — a burger resting in the “hold” zone still gets residual heat from the zone next to it.
- Hot spots exist even within a single zone. Directly above the burner runs hotter than the edges and corners.
- Wind changes everything. On a breezy day, the windward side of your griddle runs 50°F cooler than calm-day readings.
An infrared thermometer fixes the guessing. Knob position is a starting point, not a temperature reading.
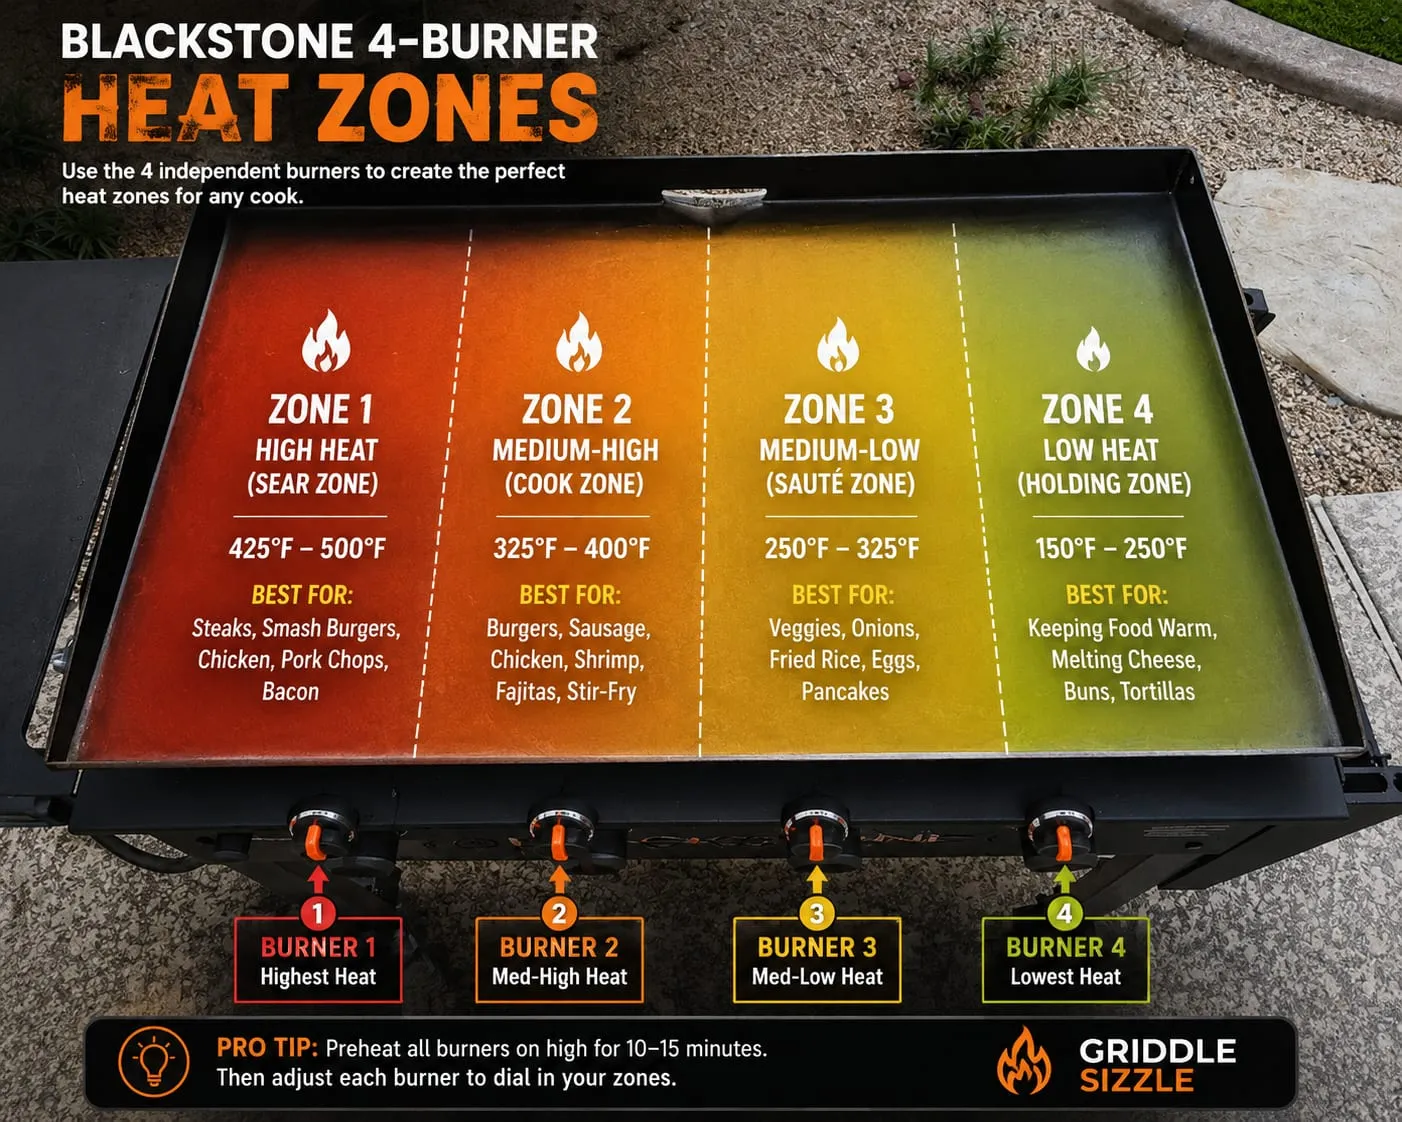
The Four Zone Types
Every zone on a working Blackstone falls into one of four roles. You won’t always use all four — a 2-burner setup forces you to combine roles — but knowing each one helps you plan how to use your surface.
Sear Zone — 425–500°F
Maximum heat, used briefly. This is where smash burgers, fried rice, thin steaks, and shrimp go for their Maillard reaction. Food spends 1–3 minutes here, not longer. If you’re holding things here while waiting on other zones, you’re overcooking.
Cook Zone — 350–425°F
The workhorse zone. Chicken thighs, sausage patties, pork chops, thick burgers, hash browns — proteins and vegetables that need time to cook through without burning. Most surface use happens here.
Finish Zone — 325–375°F
Medium heat used to bring things to final temperature without adding more crust. A burger gets seared in the sear zone, moves here for 30 seconds to melt cheese. Chicken moved here to confirm 165°F internal before coming off.
Hold Zone — 200–250°F
The zone nobody talks about enough. Set one burner to its lowest setting, and the far edge of that zone stays in the 200–230°F range — hot enough to keep finished food warm without continuing to cook it. This is how you get everything to the table at the same temperature.
Standard Zone Setups
Breakfast (4-Burner Setup)
The hardest meal to coordinate on a griddle. Bacon runs hot; eggs run cool. Everything needs to finish at the same time.
| Burner | Zone | Temp | Food |
|---|---|---|---|
| Left | Cook | 400°F | Bacon, sausage |
| Center-left | Cook | 375°F | Hash browns |
| Center-right | Finish | 325°F | Pancakes / french toast |
| Right | Finish/Hold | 300–325°F | Eggs (start here after other items are nearly done) |
| Back right edge | Hold | 225°F | Finished items holding |
The key move: cook bacon and hashbrowns first. Let the left side cool from 400°F to 325°F, then use it for eggs. Eggs go on last, not first — the griddle temp comes down naturally while the protein side finishes.
See the griddle temperature guide for specific temps by food.
Burger Night (3-Zone Setup)
You don’t need all 4 burners for a burger cook.
| Burner | Zone | Temp | Use |
|---|---|---|---|
| Left | Sear | 450°F+ | Smashing patties, searing |
| Center | Cook | 375°F | Toasting buns, caramelizing onions |
| Right | Hold | 225°F | Finished burgers, melted cheese, holding buns |
The hold zone here is the secret weapon. Stack the finished smash burgers on the right side while you finish the batch. They stay warm, cheese stays melted, buns stay soft. Then you build all the burgers at once.
Fajitas or Stir-Fry (High-Low Setup)
Some meals want two contrasting zones and nothing in between.
| Side | Zone | Temp | Use |
|---|---|---|---|
| Left 2 burners | Sear/Cook | 425°F | Chicken or steak strips, constant movement |
| Right 2 burners | Hold | 225°F | Finished protein, warm tortillas |
After the protein is done, drop the left side to medium (375°F) and cook the peppers and onions there — they need less heat than the meat.
Dinner for a Crowd (Full 4-Zone)
When you’re cooking a full spread — protein, two sides, something in a pan — you need all four zones active and shifting.
Early in the cook:
- Left: Sear (500°F) — steaks
- Center-left: Cook (400°F) — mushrooms, asparagus
- Center-right: Cook (375°F) — thick vegetables that need more time
- Right: Hold (250°F) — finished items
Mid-cook:
- Left: drops to Cook (400°F) — steaks moved here to finish to temp
- Center-left: Finish (350°F) — basting and resting
- Center-right: unchanged
- Right: Hold (250°F) — everything parked here
At plating:
- Left and center drop to Hold or off
- Everything moves right for 3–4 minutes to equalize temp before serving
Meal Prep Session
Meal prep is about volume, not speed. Use medium-high throughout and rotate in batches.
| Side | Use |
|---|---|
| Left 2 burners | Active cooking — proteins in rotation |
| Right 2 burners | Resting and cooling before containers |
Don’t use a hold zone for meal prep — you want food cooling down, not staying hot. Use the right side at room temperature to stage cooked batches before they go into storage containers.
See the Blackstone meal prep guide for a full session walkthrough.
Dynamic Zone Management
A static zone setup is a starting point, not a rule. Good griddle cooks shift zones as the cook progresses.
Common mid-cook adjustments:
- Drop a sear zone to cook after the first round of smashing — the griddle has done the hard work, now you need more sustained heat, not peak heat.
- Expand the hold zone late in the cook — when most food is done and you’re just managing the last items, lower a second burner to hold and park more on the right.
- Raise a zone for basting — if you want a final hit of high-heat crust on a resting piece of chicken, bring the left side back up for 60 seconds, move the chicken there, then return to hold.
- Kill a burner entirely — for a 2-person cook on a 36”, running 2 of 4 burners on medium is often enough and keeps the far zones genuinely cool.
Tips for Better Zone Control
Start higher, adjust down. It’s faster to drop a zone from high to medium than to bring a cool zone up to sear temp. Preheat all burners on high, set your zones once you’re measuring actual surface temps.
Learn your hot spots. Every Blackstone has them — areas that run hotter than the knob setting would suggest, usually directly above the burner tubes. Mark these mentally and use them intentionally for searing or avoid them for delicate items.
The back edge stays warm. Even with a burner off, the rear of the cooking surface retains heat from adjacent zones. Use the back edge as a passive warming strip for tortillas, buns, and finished items with no burner under them.
Wind shifts your zones. In windy conditions, your windward side loses heat faster. Either block the wind with wind guards or plan your zone layout with wind in mind — sear zone on the leeward side where it holds heat better.
Related guides: Blackstone Temperature Guide · Blackstone Meal Prep Guide · How to Cook Steak on a Blackstone
Shop Infrared Thermometer on Amazon
Frequently Asked Questions
What’s the best heat zone setup for a 4-burner Blackstone?
For most cooks: left burner on high (sear), center-left on medium-high (cook), center-right on medium (finish), right on low (hold). Adjust from there based on what you’re making — fajitas want two high zones, a breakfast cook wants more medium-range zones with eggs going last.
How do I manage heat zones on a 2-burner Blackstone?
Combine the sear and cook roles on the left burner and use the right burner as your hold/finish zone. For a sear, crank the left to high briefly, then drop it to medium after the initial crust forms. You’ll need to cook more sequentially than a 4-burner allows, but the zone principle still applies.
What temperature should the sear zone be?
425–500°F for most searing. Smash burgers want the highest temp you can reach. Thin steaks work at 450–475°F. Chicken seared at 425°F then finished at medium. Use an IR thermometer to confirm — your knob settings are guides, not readings.
Can I just cook everything on one zone?
You can, but you lose the main advantage of the flat-top. Cooking everything at the same temp means everything takes longer and you can’t stage food to keep it warm while finishing the rest. The hold zone alone changes how smoothly a cook goes.
How do I keep food warm without overcooking it?
Set one burner to its absolute minimum and measure the surface temp on the far edge of that zone. If it reads above 250°F, you’re still cooking food, not holding it. A properly set hold zone reads 210–240°F — warm enough to maintain serving temperature without any additional cooking.
When should I shift zones during a cook?
When your food’s needs change. A steak starts on the sear zone, finishes on the cook zone, rests on the hold zone. That’s three zones for one steak. Think of zones as dynamic — the burner knob is yours to move, not a set-it-and-forget-it control.
Blackstone Igniter Not Working? Fixes + How to Light It
Blackstone igniter not working — the dead battery fix that solves most, five more causes to check, and how to light the griddle manually.
Blackstone Not Getting Hot? 7 Fixes for Low Flame and Weak Heat
Why your Blackstone isn't getting hot — the regulator safety reset that fixes it 9 times out of 10, plus six other causes of low flame.
Blackstone Seasoning Sticky or Flaking? The Fix
Sticky, gummy, or flaking Blackstone seasoning — what causes each, the fix that doesn't require stripping, and when to fully re-season.