What You’ll Need
To convert a Blackstone griddle to natural gas, you must buy the Blackstone Natural Gas Conversion Kit. The kit features a 10-foot natural gas hose and a quick-connect fitting; both sized at ⅜ inches.
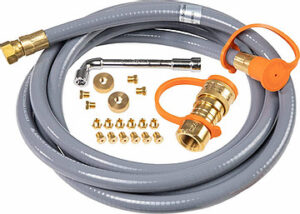
Be aware that this size isn’t compatible with every natural gas hookup. Blackstone recommends that clients buy a reducer to fit the hose to the gas valve snugly if this is the case.
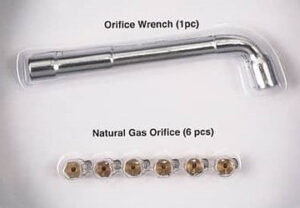
The pack also includes 16 natural gas orifices of various sizes (M6 x .75 thread and an M6 x 1.0 thread), two thread check gauges, and a 7-millimeter orifice wrench.
Although the Blackstone Natural Gas Conversion Kit does not include a thread sealant, it’s necessary to acquire a pipe or thread sealant to connect hoses and valves. It’s important to buy a sealant compatible with natural gas and withstand temperatures of up to 400 degrees Fahrenheit.
Step 1: Prepare Your Natural Gas Griddle
If you’ve recently used your Blackstone griddle, it’s vital to ensure that the control knobs are turned off, and the liquified petroleum tank is closed before beginning the conversion.
Disconnect the propane tank from the griddle and store it in a safe location. According to the Consumer Report Product Safety Commission, liquid petroleum, also known as propane, is extremely flammable and responsible for over 500 house fires every year.
To reduce this risk, always store the containers in an upright position and never near a heat source or in a hot car, as this may cause the gas to escape.
After you safely transport and store the propane tank, separate the griddle’s cooktop from the griddle’s frame. Use a Phillips-head screwdriver to remove the screws that connect the burner to the griddle, as well as the burner tubes.
If you have a Blackstone Rangetop Combo model, use a Phillips-head screwdriver, as well as an adjustable wrench, to remove the screws and nuts. Then, place the burners aside.
Step 2: Install the Orifices
First, use the orifice wrench, which can be found in the conversion kit, to remove the brass orifices from the back of the griddle. The valves will now be exposed.
After you remove the orifices from the valves, utilize the thread check gauge to verify the threads. Then, thread the gauge into the propane orifices. While completing this process, it’s vital not to use too much force to avoid crossing the orifice threads.
Once you’ve completed the last step, install the threaded natural gas orifices into the valves. Apply the thread sealant before attaching the orifices. It’s recommended to first tighten the orifices by hand before transitioning to the 7-millimeter wrench.
Again, it’s important not to over-tighten the orifices during this stage, as the valves are made of brass and susceptible to damage.
Step 3: Reassemble the Natural Gas Griddle
To reinstall the burner tubes removed during the first step, slide the tubes’ open end over the exposed gas valves and tightly screw them in.
Then, replace the griddle top, as well as the burner grate (if it’s included in your specific Blackstone model).
Step 4: Attach the Natural Gas to the Natural Gas Griddle
While Blackstone recommends that you recruit a professional to connect your natural gas supply to your griddle, but it’s also possible to do it yourself.
First, grab your adjustable wrench to remove the propane hose from the body of the natural gas griddle. It’s recommended to keep the hose if you wish to convert the natural gas outdoor griddle back to propane in the future.
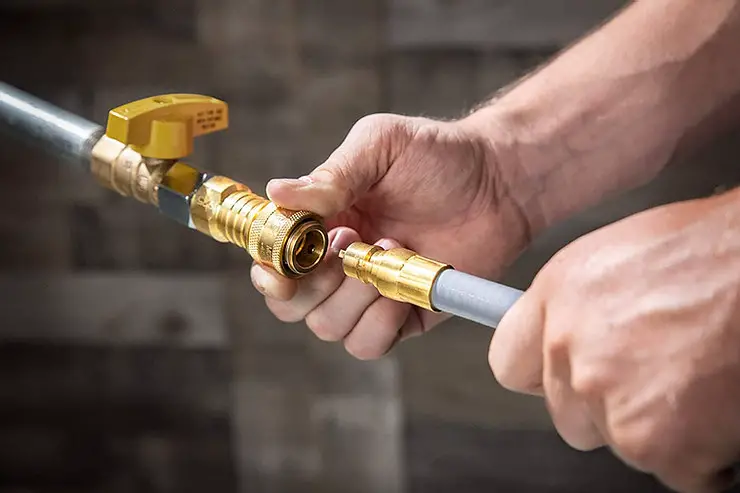
Then, attach the natural gas hose found in the Blackstone Natural Gas Conversion Kit to the griddle using the adjustable wrench. The kit also includes a quick disconnect tool, which must be screwed to your house’s natural gas valve using thread sealant.
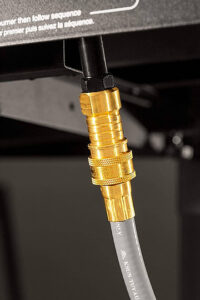
Connect the other end of the hose to the natural gas griddle. To complete this task, ensure that the fitting area is debris-free. Then, push the quick-connect fitting into the locking collar. Please give it a good yank to make sure the two pieces are firmly secured.
Finally, turn on the natural gas and use soapy water to check for any dangerous gas leaks. No leaks? You’ve successfully converted your Blackstone griddle to natural gas.